Disclaimer: I am an affiliate for Bluehost, but I wouldn’t recommend them if I didn’t use them to host my own site. So, if you should choose to sign up for web hosting through a link on this page, I may be compensated.
Bluehost is the provider I use to host this site. When starting your own blog, one of the first steps is to purchase a hosting plan.
 There are a lot of different hosting providers available in addition to Bluehost, so it can be difficult to know which one to select. While I’m not saying they are the best option for everyone, after researching some other options, I ultimately chose Bluehost for the following five reasons.
Price
If you are just starting out, Bluehost offers incredible value. Their basic, shared hosting plan starts at $3.95 per month (and sometimes goes down to $2.95 during a sale).
At this price, you get hosting for one website, plus you get a free domain (which in itself is worth $12 a year).
If you have multiple sites, you can upgrade to the unlimited plan for only $5.95 per month. They also offer a WordPress plan for $19.99 per month, but you can actually host a WordPress site on any one of their plans.
Even at these low prices, Bluehost has an incredible uptime of 99.93%.
Easy to Use
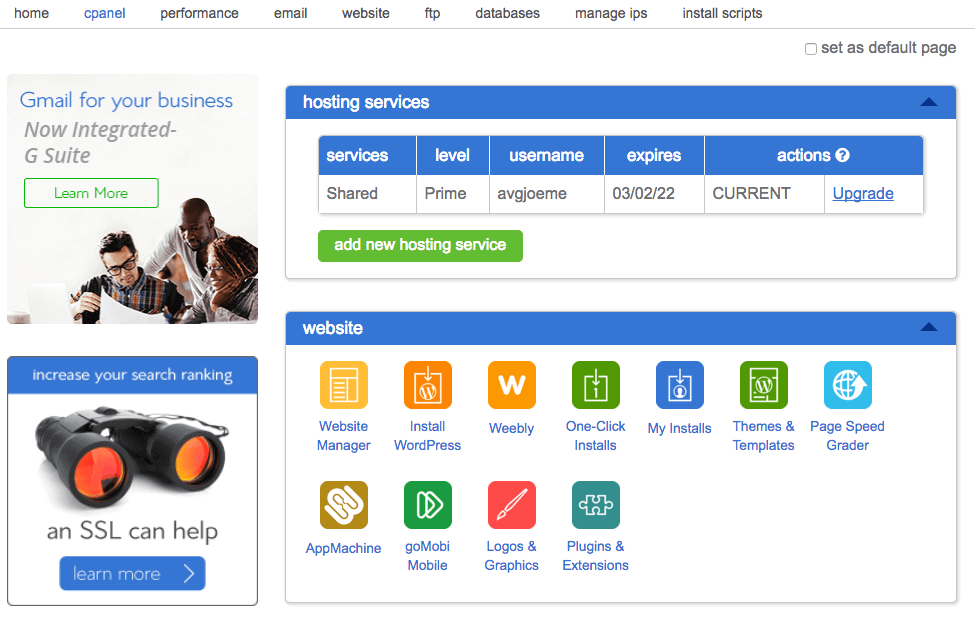
One of the things I absolutely love about Bluehost is their Cpanel.
The Cpanel is like the mission control for your site. From here you can create an email address for your domain, purchase or transfer in a domain or add a variety of security features. Plus, it’s user-friendly. If you can navigate a computer, then figuring out the Cpanel will be no challenge at all.
Simplified WordPress Install
Chances are your blog or website will run on WordPress. I mean it does power over a quarter of all websites!
If that’s the case, Bluehost offers a super simple installation process. You’ll have your site up and running in minutes.
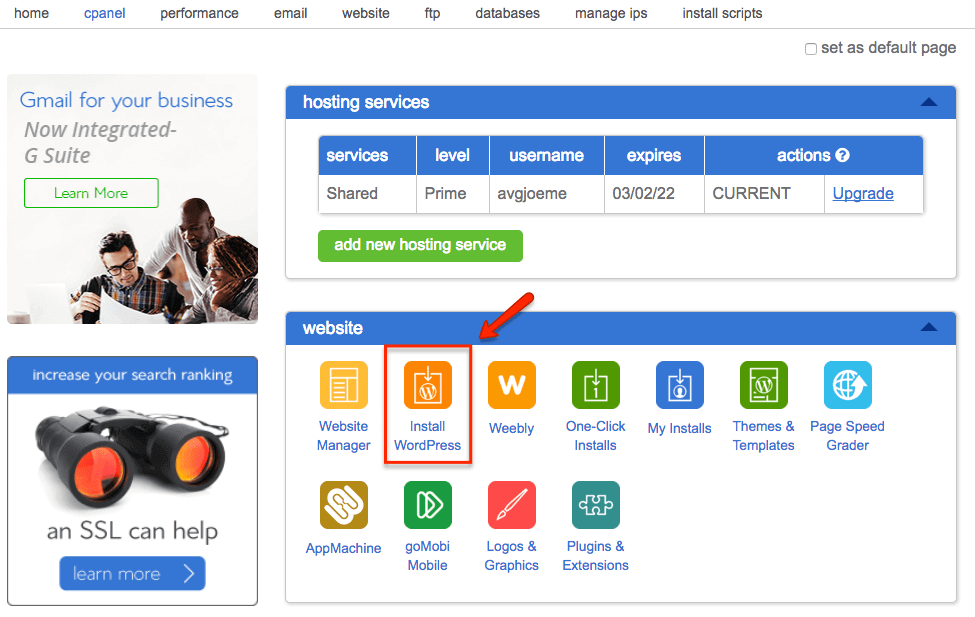
Simply start by clicking the WordPress install button on the Cpanel.
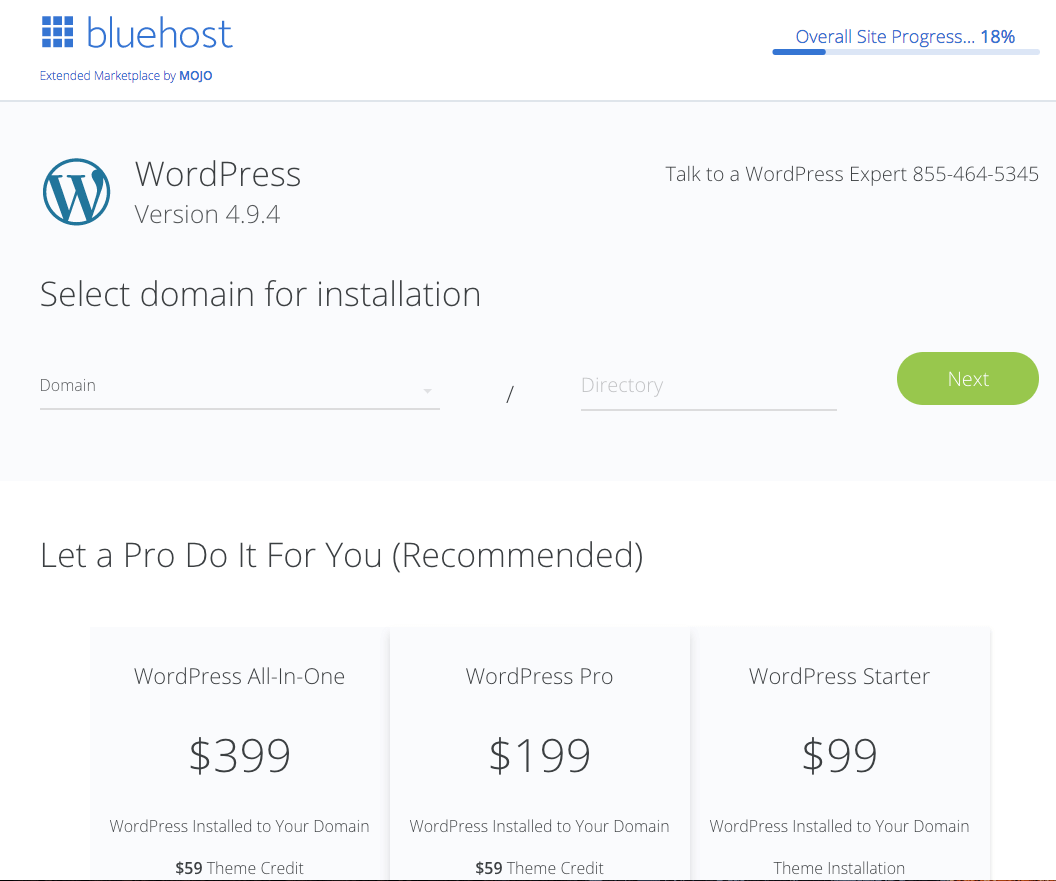
Select your domain and click Next. You can ignore those ads at the bottom for professional installation. Even a non-techie can install WordPress on their site.
Next, enter all of your site and admin info. This is the information you will use to log into your site to make changes to your theme or schedule posts.
Remember don’t use admin as your username! If you do, you’ll be asking to get hacked.
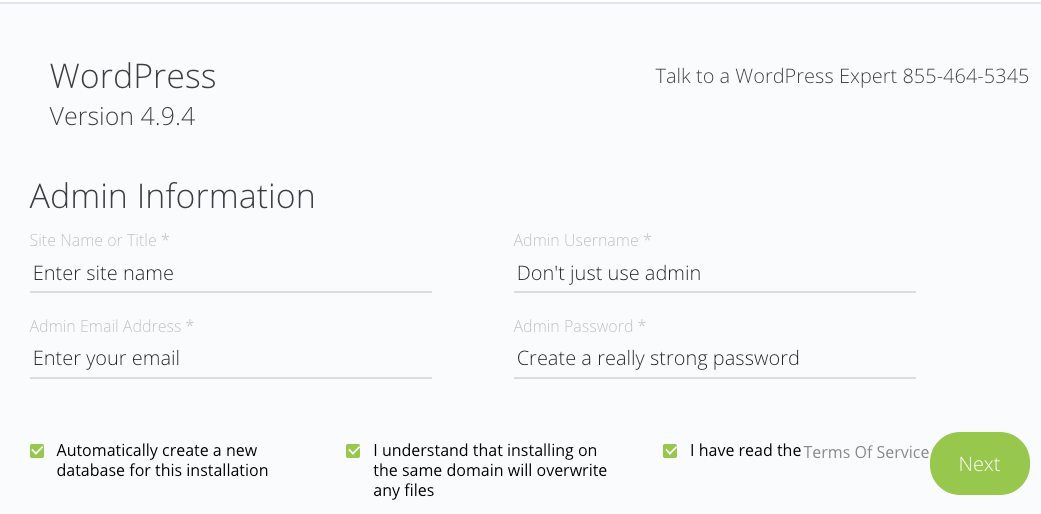
Now you wait . . .
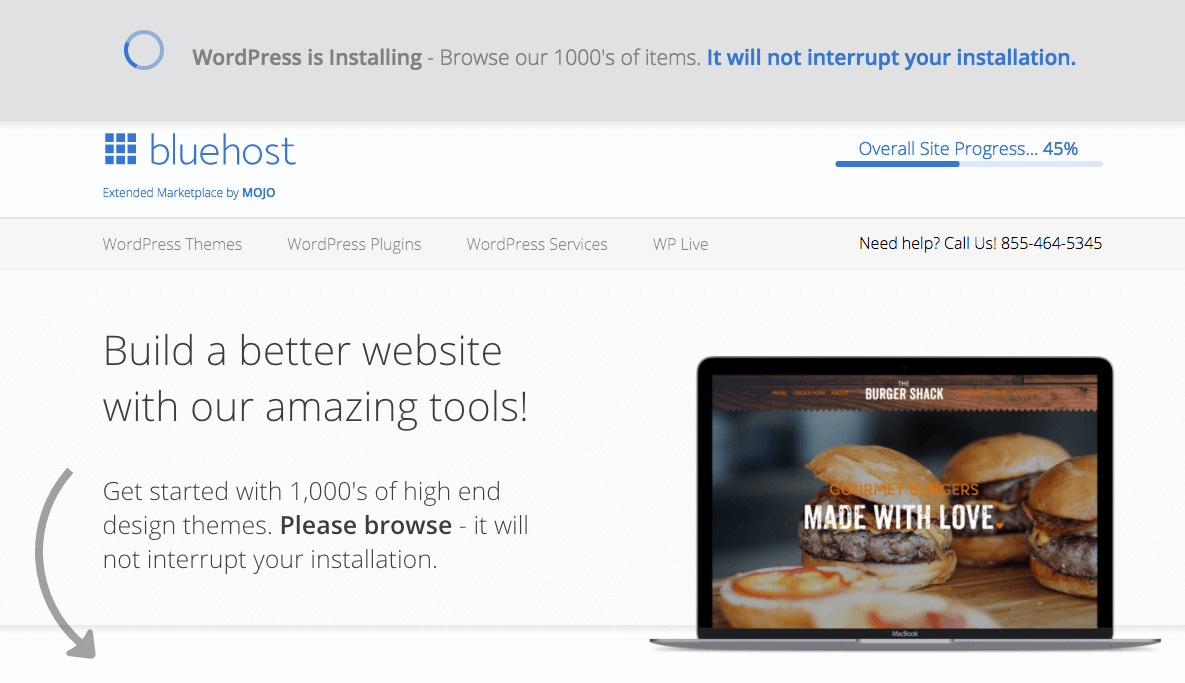
And you’re done! See that wasn’t so bad.

At this point, Bluehost will show you are only 50% complete, but WordPress has been completely installed. The remaining 50% is picking a theme and customizing your site, but you don’t need to do that now. You can log into your new site by going to www.yourdomainname.com/wp-admin and entering the username and password you created. From the admin dashboard in WordPress, you can finish setting up your site.
Free SSL Certificate for WordPress
This is one of my favorite features. A Secure Sockets Layer or SSL certificate is the difference between HTTP and HTTPS. Having HTTPS in your URL is a sign that your website is secure. Essentially, it is a type of encryption that provides for added confidentiality and site integrity.
Upgrading your site security is a great way to boost the confidence of your readers. Google is also starting to track which sites are secure and which aren’t.
While I’ve heard mixed results on whether being HTTPS currently helps your search ranking, there’s no doubt that it will in the future as Google places more emphasis on security.
Purchasing an SSL certificate separately would cost around $50-$100 per year. If you use Bluehost and have a WordPress site, you can get an SSL certificate for free.
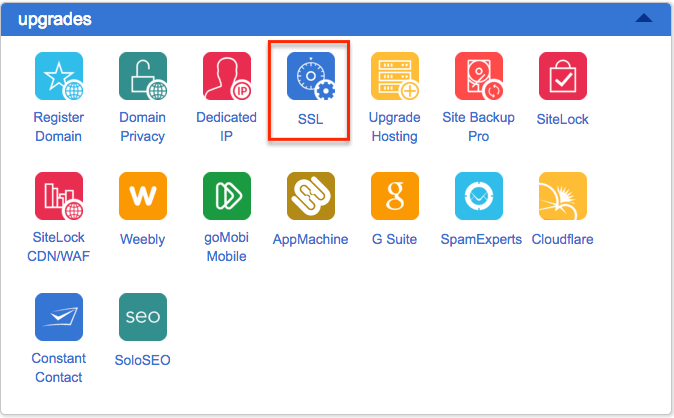
To get your free certificate and convert to HTTPS is a two-step process. First go back to your Cpanel and select SSL.
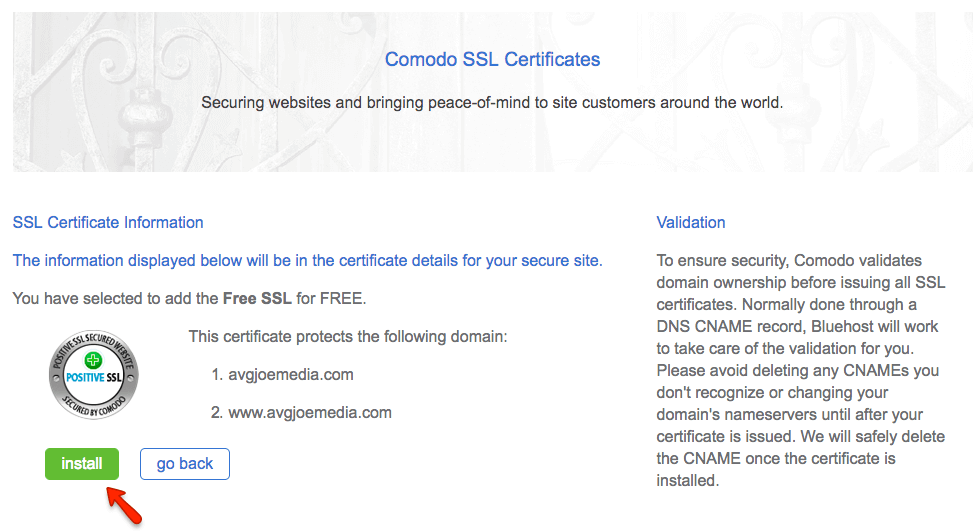
Then select your domain and click Get Started under the WordPress Free SSL section.
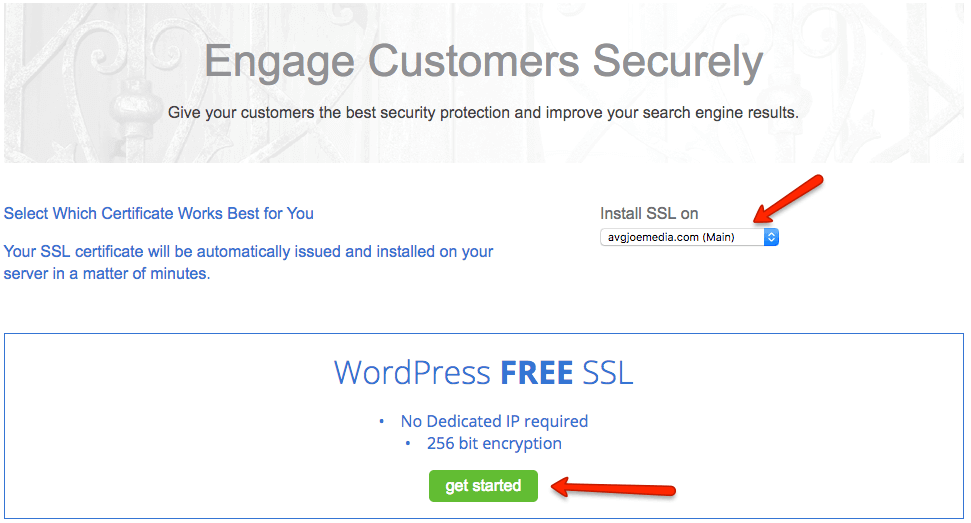
On the next screen click Install and you’re done with the first part.
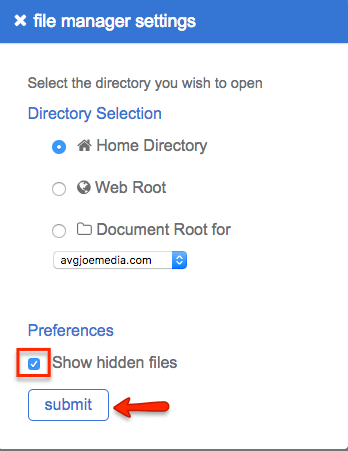
The second part is a little more technical, but really not that difficult. Head back to the Cpanel and select File Manager.

When the popup appears, be sure to check the box next to Show hidden files and click submit.
In your files under public_html you should see one names .htaccess. Select it and click Code Editor on the top toolbar.
![]()
In the file enter the following code (change yourdomainname to your actual domain):
RewriteEngine on
RewriteCond %{HTTPS} off
RewriteCond %{HTTP_HOST} ^yourdomainname\.com [NC,OR]
RewriteCond %{HTTP_HOST} ^www\.yourdomainname\.com [NC]
RewriteRule ^(.*)$ https://yourdomainname.com/$1 [R=301,L]
This code creates a permanent (301) redirect. By doing so any time something enters your URL they will be automatically taken to the secure, HTTPS page. The 301 redirect tells search engines that all pages on your site have moved to HTTPS. This is important if you have an existing site and you don’t want to lose any of your SEO rankings.
Click save and you’re done, you’ve converted your site to HTTPS for free!
Ability to Scale as You Grow
As your site grows, increasing speed (link) and bandwidth becomes more important. Once you start reaching tens of thousands of page views each month, a shared hosting plan might not be fast enough. Luckily, Bluehost offers a variety of different options and makes it easy to upgrade.
In addition to their shared hosting plans, they also offer cloud hosting, and dedicated servers for larger websites. Cloud hosting plans are still reasonably priced between $6.95 to $15.95.
Dedicated servers are more expensive (starting at $79.99/month), but if your site is large enough that you need them, then you can probably afford them. Plus, since you are still with Bluehost, upgrading is easy. You won’t have to worry about moving your entire site to another provider as you grow.
Summary
If you’re looking for an affordable and reliable hosting plan, I suggest you take a look at Bluehost. I use them for my site and haven’t had any issues so far. They make it easy to set up a WordPress site and offer a lot of great options as your site grows.
If you’re interested, you can sign up today for as little as $3.95 per month.


Leave a Reply