

I first had the idea for this site about a year ago, but I didn’t know how to create your own blog. After a lot of research, I discovered that while it’s not technically difficult to start a blog (you really just need a domain name and web hosting) it does take time and effort to do well.
Is one of your goals for the year to start your own site? If it is or even if you are simply interested in how to start a blog, follow these 7 basic steps.
Overview
- Determine a Blog Topic
- Start Writing
- Register a Domain Name
- Signup for Hosting
- Install WordPress
- Choose a Theme
- Start Posting
1. Determine a Blog Topic
Before you start worrying about domain names or site design, nail down your topic. Being a CPA, I have experience in finance and enjoy discussing it. Determine what you are passionate about or enjoy doing. Maybe you’re really into coding apps or you love to knit.
Start by making a list of your hobbies or topics you always find yourself discussing with other people. These will be the best topics for your blog. In addition, make sure that the topic provides you with a lot of information to discuss. Remember once you start a blog, you will need to post regularly (at least once a week) to keep your followers engaged. If you don’t have much to say about your topic then you will run out of posts to write too quickly.
Don’t let a lack of expertise stop you from selecting a topic. Sometimes having a basic knowledge of the topic and then growing your knowledge with the blog is better than starting out as an expert. Readers often connect better with people learning a topic just like they are. Don’t wait to become an expert before you start, use the blog to document your journey.
2. Start Writing
You may think this step is a little early, but I suggest starting to write posts as soon as you have your topic. As I mentioned earlier, making sure you can post content consistently is key to any successful blog. So why go through the trouble of creating a website if you find that after 10 posts you have nothing left to say? I started writing blog posts about 6 months before I created my website.
Another benefit of writing before your site it ready, is that when you finally do launch your blog, you will have a lot of awesome posts ready to go. This will allow you to make sure you have some content ready on day one. When I launched Average Joe Finance, I put up a few posts right away so it didn’t look like the site just launched. Having some extra posts is also a great way to keep the pressure off of having to always write a new post each week.
Don’t think that every post you write needs to be a winner either. By the time I launched my site, I had about 40-50 posts written, probably half of which I’ll never post. Take this time to practice and hone in on your writing style. Don’t be afraid to write a post and then never use it. That may seem like a waste of time, but I learned so much more from my “bad” posts than I did my “good” ones. Take it as a learning experience. Analyze what you didn’t like about the post so that you can improve on your next one.
Another great idea at this stage is to start reading other blogs in your niche. The key to a great blog is writing about what your audience cares about. What better way to perform market research than to see what is already doing well? Find other popular blogs in your niche and read through their top posts. What topics do they cover? What did you like/not like about the post? Was the title catchy? Actively engage when reading these posts and think of ways to improve your own posts.
3. Register Your Domain Name
Your domain name is how your readers will find you, so make sure it fits your brand. As more and more domain names are registered, it can be difficult to get a dot com name, but dot co or dot us are great alternatives.
Many web hosting companies offer domain registration, but I recommend keeping your domain and hosting separate. As your site grows, you may want to change hosting providers. You would also have to pay to transfer your domain as well. If you keep the two separate it becomes much easier to change hosting providers.
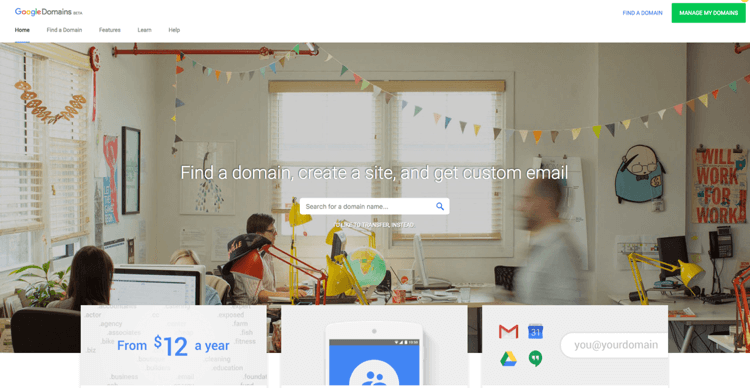
I use Google Domains to register my domain names. Most domains are only $12/year. By registering with Google you also have the ability to sign up for G Suite for $5/month to create a custom @yourdomain email address.
4. Select a Hosting Provider
Once you have your domain, you need web hosting so that readers can access it. For those of you who may not be as tech savvy, a hosting provider essentially gives you access to a computer that is always connected to the internet called a server. You can then copy your website files to this server and direct anyone entering your domain name to those files. The cost of the hosting depends on several factors. These include how much information you want to save to the server and whether you share the server space with other users or if you are using a cloud based server.
For hosting this site, I use Bluehost. Bluehost powers over 2 million websites and offers a number of tiers so it’s great when you are just starting out, but it can also grow with your needs. The most inexpensive options are the shared hosting packages.
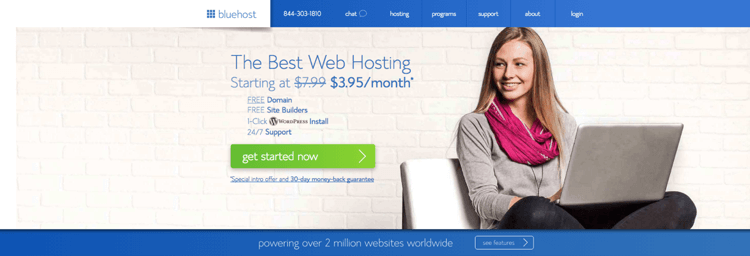
These plans offer the slowest speed since you will be sharing a server with other sites, but are great economically for a new site. Unless you have tens of thousands of pageviews per month, then a shared hosting package will be fine. Share hosting for one site starts at $3.95/month. If you have multiple sites, you can get shared hosting for only $5.95/month. Plus Bluehost offers a number of features to new customers like free Google AdWords.
Bluehost also offers a WordPress hosting plan starting at $19.99/month. While you may think this is needed if you are going to use WordPress, it’s not. You can run a WordPress site on the shared hosting package as well. In fact, the shared hosting package offers one-click WordPress install. I recommend saving some money and using the shared hosting package to start.
If you are ready to start your blog, use this link to sign up for Bluehost today for $3.95/month. Bluehost also offers a free domain if you don’t want to use Google Domain. However, like I said earlier, I believe it’s better to keep your domain and hosting separate.
Link Your Domain
Once you have your hosting set up, if you used Bluehost’s free domain everything will already be configured. If you used Google Domain then you’ll need to link the domain to your hosting account. Linking your domain is an easy process with Bluehost’s cpanel and only takes a few minutes. You can find instructions here.
Start Your Blog Off Right with the Ultimate Blog Starter Kit
Get My Free Copy
Start Your Blog Off Right with the Ultimate Blog Starter Kit
Get My Free Copy5. Install WordPress
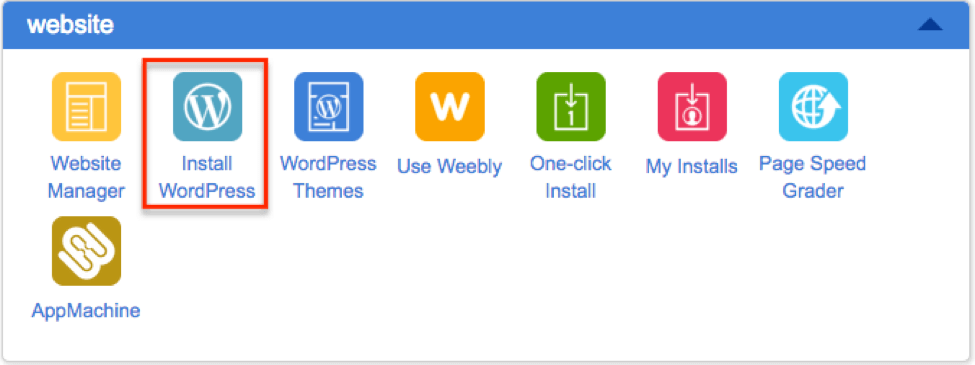
Once you have your domain and hosting setup, it’s time to install WordPress and get your blog started. One awesome feature of Bluehost is that it offers one-click installation of WordPress. Simply log into your cpanel and click the “Install WordPress” button.
WordPress is a free, Content Management System (CMS), which is a fancy way of saying it can easily organize a lot of information. This is great since blogs typically have a ton of content between posts, images, comments, etc. While there are other Content Management Systems available, WordPress is by far the largest. Recent estimates show that around 26% of the internet is powered by WordPress . This massive user base means that there are tons of plugins available. These plugins allow you to easy add awesome features to your site without having to know how to code. Plus, a quick Google search can get you pretty much whatever support you need.
This site runs on WordPress and it is extremely easy to navigate and manage.
6. Choose a Theme
A theme in WordPress is the visual of your site. The theme is the first thing your readers see when they visit your blog. So, choosing a high-quality theme is important.
WordPress offers some free themes that you can use to get started, if you want to set your site apart you’ll need to either create your own theme or buy a premium one. I created my own theme for this site, but unless you are familiar with HTML, CSS and PHP I wouldn’t recommend it. You’re better off purchasing a theme.
Theme Forest is a great site for finding some of the best WordPress themes. You can check out their top themes of the year here.
Once you have selected and installed your theme, you will need to activate it. To do so, simply log into WordPress go to ‘Appearance’ and then select ‘Themes’. Find the theme and select ‘Activate’.
If you decide in a year that you want to completely redesign your site, you don’t have to worry about losing all your existing posts. You simply install and activate a new theme and the look of your site changes, but your content stays the same.
7. Start Posting
Now that you have your WordPress site set up and your theme installed, it’s time to start adding those posts you’ve been writing.
Hopefully by this point you have 3-5 quality posts that you can add immediately. This way initial readers will be able to stay on your site awhile. Be sure to have at least one link to another page on your site in each post. Once you have a reader on your site, you want to keep them there. If you don’t have any links to other pages, chances are they will read the one post and leave.
Having a few posts up will also help searches engines determine what your site is about. Google and other search engines crawl or read your site to look for keywords. The more content you have, the easier it is for them to determine what you are writing about. However, just because they know what your site is about does not mean it will improve your rankings. For that you will need to focus on Search Engine Optimization or SEO.
Once you have a few posts up, start promoting your site on your social media channels. Getting that initial traffic is tough, but once you start to see people are using your site, it’s extremely rewarding.
Now that you’ve posted a few articles, come up with a publishing schedule and stick to it. Your readers will expect consistency.
Start Your Journey
While it may seem like a daunting task, by following these steps you’ll be able to have your blog up and running in no time. Just remember, with hard work and dedication anything is possible.
Ready to start your blog today? Sign up for Bluehost for only $3.95/month.
Started your own blog? Put a link and a brief description in the comments so I can check it out.


A wealth of information! I am relatively new to blogging so I am still learning from others. I now need to go back through my posts and add some links to other pages. Thank you for sharing!
You’re welcome! Getting started can be a bit overwhelming at first, but just take it one step at a time. Remember nothing is going to be perfect, but the great thing about blogging is, is easy to make changes so you can improve as you grow.
Simple and exact. This is a great read for newbie bloggers, it seems you’ve provided good information here.