The Importance of Page Speed
You spent weeks setting up your blog and writing some amazing content, but you don’t seem to be getting traffic from Google. You’ve probably looked up countless articles on SEO, but have you considered improving your site’s speed?
Your website’s load time (or page speed) is one of the many factors that Google uses in ranking your site. Simply put, it’s how quickly your site loads on a user’s computer or mobile device. The ability to load a page quickly is even more important now that over 50% of internet usage worldwide is from mobile devices. If you have large images or a lot of JavaScript, your page will load much slower.
If you want to perform a website performance test, you can use Google’s free PageSpeed Insights. It ranks the URL you enter out of 100 and offers some recommendations to improve your results.
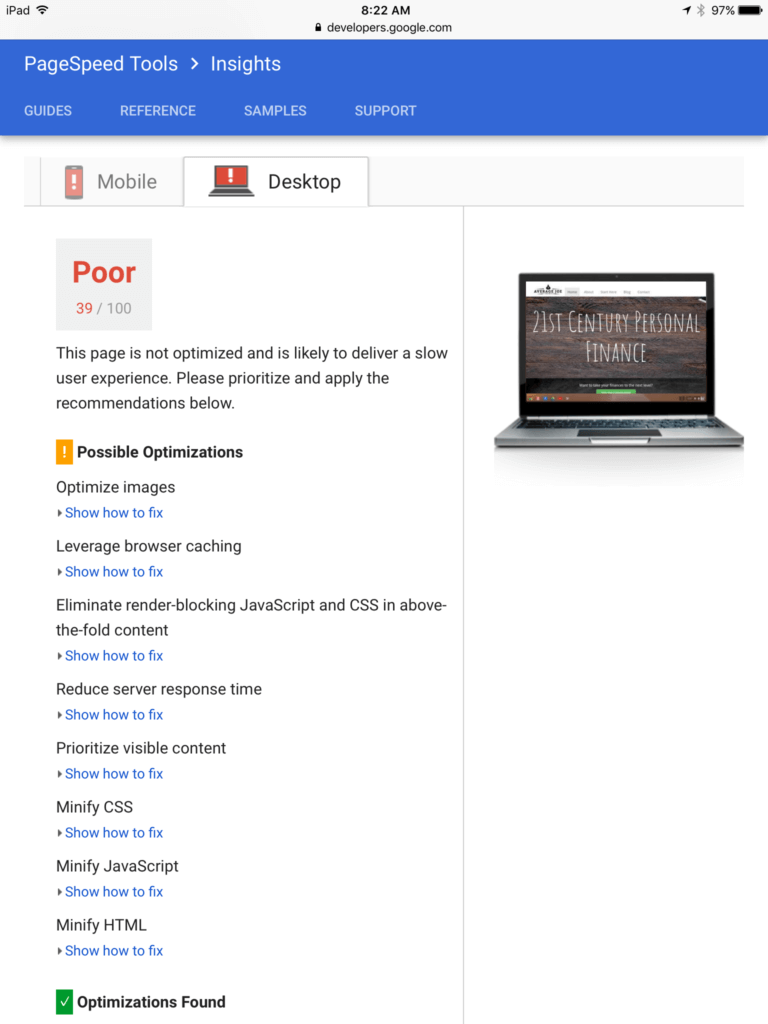
When I first launched my site, my page speed test results were terrible. I had 31/100 on mobile and 39/100 on desktop. 
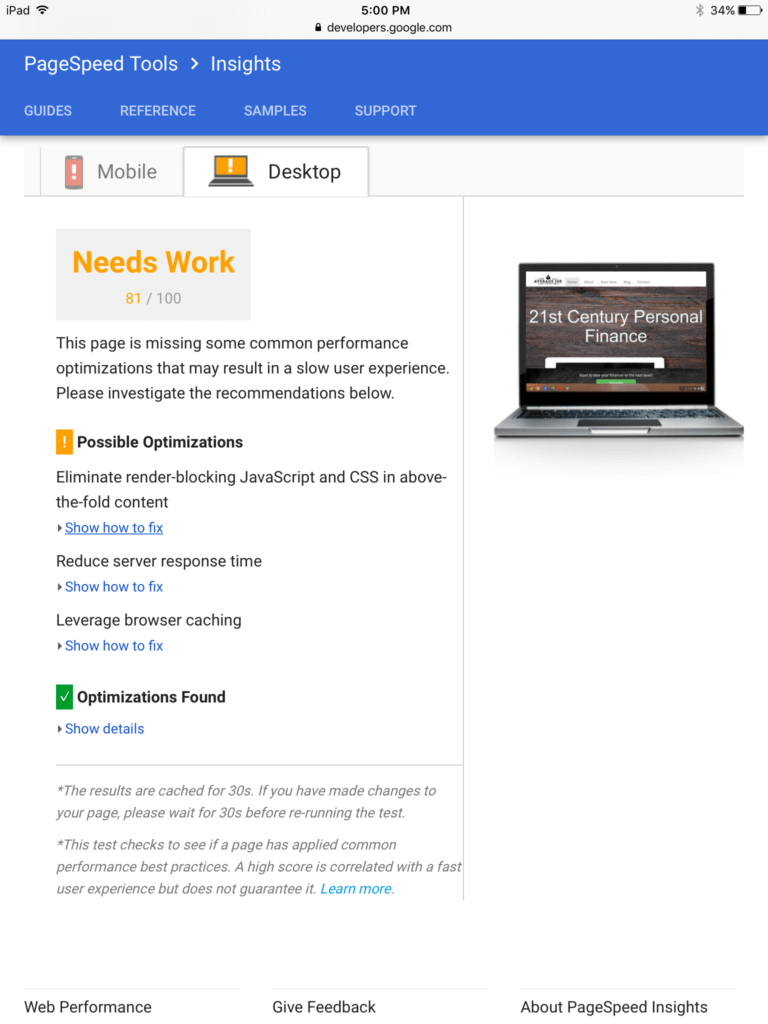
I read Google’s recommendations, but they didn’t provide much concrete direction on how to increase my website’s speed. After countless hours of research and a lot of trial and error, I was able to increase my page speed to 64/100 on mobile and 81/100 on desktop. While this isn’t 100/100, I’m still pleased with the results since I’ve gotten similar results from other blogs I’ve tested in my niche.
Since I had such a difficult time finding easy advice on increasing page speed, I decided to put together the steps I took to increase my website’s performance.
Start Your Blog Off Right with the Ultimate Blog Starter Kit
Get My Free Copy
Start Your Blog Off Right with the Ultimate Blog Starter Kit
Get My Free CopyDisclaimer: Some of the steps I took involve having access to your website’s source files and can get a bit complicated. If you self-host your site, you should have no problem implementing any of the steps. I’ll start with some of the simple steps you can take with WordPress plugins and then move into the more advanced optimizations. Feel free to pick and choose what you implement. Even one or two of these steps can boost your website speed.
The Basics
If you want to increase your page speed in WordPress, it’s a simple process. Using just the following two plugins, you can dramatically increase your site speed.
Related: Start Your Own Blog in 7 Steps
Compress JPEG & PNG Images by TinyPNG
This plugin is the best free image compressor I’ve found for WordPress. After installing the plugin, any image you add is automatically compressed. You can also select “Bulk Optimization” to compress any images you have already loaded on your site.
TinyPNG gives you 500 compressions free per month, which should be more than enough for most users.
Compressing images can provide a big boost to your website performance. Image files are larger now than ever before. Couple this with the rise in a more visual web and it’s easy to see how quickly your site can be bogged down. TinyPNG can reduce the size of an image by over 50% without losing any quality (which is great unless you compare it to Pied Piper).
Autoptimize
All the code on your website (HTML, CSS, JavaScript) must be loaded by the user’s computer when they go to your site. A big portion of the size of these files is blank space. If you built your own site then you know that to make your code readable you need to add spaces and separate sections.
Computers, on the other hand, don’t read like humans. They don’t need spacing between characters like we do. So, to reduce the size of these files, you can eliminate this extra space by condensing (minify) the files.
The easiest way to do this is to use the free Autoptimize plugin. Once installed, go to your settings and select to optimize HTML, JavaScript and CSS. If you’re using Google Analytics, make sure you exclude this from Autoptimize.
To do so, simply type- js/jquery/jquery.js,GoogleAnalyticsObject -in the ‘Exclude scripts from Autoptimize’ box under JavaScript Options.  After this, the plugin will automatically minify all your websites code. In addition, it also changes the way your CSS and JavaScript load, so that they aren’t render blocking.
Advanced
If you don’t have access or feel comfortable changing the code of your website, you can skip to the Check Your Pagespeed Section. Even installing the TinyPNG and Autoptimize Wordpress plugins will increase your page speed. However, if you don’t mind making some changes to your site’s code, there are a few more steps to help speed up your page even more.
For the last two steps, you will need access to your sites .htaccess file. If you use Bluehost you can access it through your cPanel or directly through WordPress.
 Set Browser Cache
Once you have the .htaccess file open, copy the following code and paste it at the top of the fil, before where you see # BEGIN Wordpress:
<IfModule mod_headers.c>
Header set Connection keep-alive
<filesmatch “\.(ico|flv|gif|swf|eot|woff|otf|ttf|svg|jpg|jpeg|png)$”>
Header set Cache-Control “max-age=2592000, public”
</filesmatch>
<filesmatch “\.(css|js)$”>
Header set Cache-Control “max-age=604800, private”
</filesmatch>
<filesMatch “\.(x?html?|php)$”>
Header set Cache-Control “max-age=600, private, must-revalidate”
</filesMatch>
</IfModule>
This will tell your users’ browser to save the files (cache) for a set period, so they won’t need to load each time they visit. The idea here is most of your content on a post doesn’t change much after you initially upload it. So, the first time a user views the page, they download everything. The next time they view the page, instead of redownloading all the files, the browser uses the information it was saved locally. This helps speed up the time it takes to load the page.
Enable Gzip Compression
Gzip is a method of compressing files. Using this method of compression allows your site to send smaller files to the user. While the plugins you installed also minimize file sizes, Gzip makes sure everything is compressed. If you don’t have this enabled, you’ll see it as a recommendation from Google to increase your page speed.
While you’re in the .htaccess file copy and paste the following code after the cache code:
<ifModule mod_gzip.c>
mod_gzip_on Yes
mod_gzip_dechunk Yes
mod_gzip_item_include file .(html?|txt|css|js|php|pl)$
mod_gzip_item_include handler ^cgi-script$
mod_gzip_item_include mime ^text/.*
mod_gzip_item_include mime ^application/x-javascript.*
mod_gzip_item_exclude mime ^image/.*
mod_gzip_item_exclude rspheader ^Content-Encoding:.*gzip.*
</ifModule>
Save the file and you’re done. You’ve implemented Browser Cache and Gzip compression!
Check Your PageSpeed
Now that you’ve implemented these changes, it’s time to check your PageSpeed. As I said earlier, while I still have some work to do, these fixes helped double my website performance. 
Troubleshooting Issues
While these fixes will increase your page speed, chances are Google will still identify possible optimizations. Looking at my results after these changes, all of the items that were causing issues were related to third-party applications. The JavaScript running on my site for Facebook, Pinterest and Google Analytics were the only items showing up in the possible optimization.
Since all of this data is coming from third-party sites, the Wordpress plugins and .htaccess changes won’t impact them. I could always remove them from my site, but I feel the benefit of having Facebook and Pinterest functionality on my site outweighs the minor slowdown in page speed.
Your Results
Perform a before and after page speed test. How much did your site performance increase? Let me know in the comments.


Leave a Reply